Wednesday, September 26, 2012

ALOO GOBI (GUJARATI STYLE)


Hello Foodies!

We all know foodies are all over the world. As mentioned in my profile, I was born, raised and am married in a Gujju foodie family. The one thing I have observed being a Gujarati is we love any type of tasty food. But, in my family, all my family members including me, as much as we love trying different types of food and eating out, we nonetheless need to have home cooked Roti & Sabzi once or twice a week. Only that can satisfy us. LolJ

So, today in my home cooked meal menu I decided to make a simple & delicious Aloo Gobi but Gujju style. I make Aloo Gobi in at least 3-4 different ways. I will eventually share with you, all different types of recipes for Aloo Gobi. But, this is the quickest and simplest. As I was in hurry to cook something quick I made it. My family loves Aloo Gobi. As you all know, Gujarati food is almost always a bit on the sweeter side – we add sugar/jaggery to almost every dish. But, my recipe is for everyone (not only Gujjus). So, even though my recipe asks to add sugar to it, I have kept the measurement / quantity of the sugar to the bare minimum.  This won’t make the dish much sweet. Here the proportion of sugar mentioned in the recipe is only to take away the strong smell & a little bland taste. It will help to make the dish tastier. But, if you like it more sweet, you can definitely add some more sugar.

I enjoyed making it & my hubby having it.  Hope you all enjoy it too.

Here comes the recipe:
Aloo Gobi (Flower nu Shaak in Gujarati)

Preparation Time: 15mins
Cook Time: 15-17mins
Serving: 2-3 people


Ingredients: 
1 medium size Cauliflower (cut it in small florets)
2 medium size potatoes
2 pc green chilies
1 tbsp. of ginger (long strips)
2 tbsp. oil
¼ tsp. mustard seeds
¼ tsp. cumin seeds
1/8 tsp. asafoetida powder
½ tsp. turmeric powder
½ tsp. red chilly powder (or More)
½ tsp. sugar (or more)
½ tsp. garam masala powder
½-1 tsp. sugar
2-4 tbsp. Fresh chopped Cilantro / coriander leaves
Salt to taste

Method: 
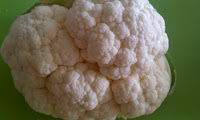
Buy a clean white cauliflower from any super market. Wash it and cut it into small - but not tiny - sized of florets as shown in picture. Also wash, peel and cut potatoes into cubes. Cut green chilies into big or small size as per your taste. Next, peel and cut ginger in strips or Juliennes. Also wash, clean and cut a small bunch of cilantro leaves.
                     
 Now put the cut potatoes and cauliflower florets in a big bowl in warm or cold water for 10mins. Don’t use hot water else the cauliflower will wilt. This process will help take away the somewhat odd smell from cauliflower. After 10 mins, strain the vegetables in a strainer. Straining the vegetable will help restrict release of much water while cooking and save the cauliflower florets and potato getting mashed. 
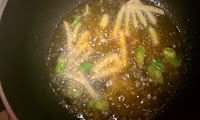
Meanwhile heat a nonstick / regular pan on medium heat with some oil. Once oil is heated add mustard seeds. Once mustard seeds start cracking, add cumin seeds and asafoetida to it. Please make sure that mustard and cumin seeds crack properly and change their color. Add green chilies, ginger & little turmeric. Add salt, turmeric, red chilly powder & sugar. Mix the vegetable well and cover the pan with lid.
             
                          
Check the vegetable by opening the lid after and pressing the potato piece by a spatula. You will find little water also in the pan. Now add garam masala to it. Mix it with a light hand so the cauliflower florets don’t get crushed. Again cover the lid for 3-4 mins and check the veg. Once you see that the potato is cooked, open the lid and let the water burn from the veg. When you see all the water has dried from the veg, shut the stove off. 
      
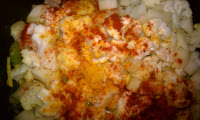
Add chopped cilantro to it and mix it with light hand. 
Serve it hot with Roti / Chapatti. EnjoyJ


Tip: To maintain visible florets of Gobi and chunks of Aloo, make sure to mix the veg, with a light hand, whenever you do so.

Sunday, September 23, 2012

Yellow Moong Dal


Hello Everyone! 

I am sure you all are having an awesome 1st weekend of the season. Welcoming Fall means bidding adieu or goodbye to summer. I love the beginning of fall for its bright colors and cool air. Today, I decided to make quick, simple but tasty Yellow Moong Dal.  I cook yellow dal in many different ways and taste. But, this is simplest and quickest.

Yellow Moong Dal is good for adults and if you cook it thin & without much spices, it’s great for kids, as well. It doesn’t take long time to cook or much of ingredients, low in calories, healthy and yet full of flavor. I like to eat Yellow Moong Dal anytime of the year. I Love to have it with Roti/Chapati or Rice. I am sure you will enjoy it too.

Yellow Moong Dal Recipe

Serving: 4
Preparation time: 20-25mins
Cooking time: 20mins


Ingredients:
1-1/4 cup of Yellow Moong Dal
3 cups of water for pressure cooker
3 cups water for dal
1 tbsp. of ginger chopped or paste
1 tbsp. of chilly chopped or paste
¼ tsp. of turmeric powder
½ tsp. garam masala powder
1 tsp. oil
1 tsp. butter or Ghee (I used Ghee)
2-3 pcs of cloves
½ tsp. of cumin seeds
¼ tsp. of Asafoetida or Hing
2-3 pcs. of dry whole red chilly
1 tbsp. of Lemon Juice
¼ cup chopped cilantro / coriander leaves


Process:

Take the dal in a bowl and wash it well. You can soak it for 20-30 mins in water if, you have time before pressure-cooking. I was short by time. So, I washed the dal, put it in a pressure cooker with 3 cups of and heat it on a stove.  Pressure-cook it for 4 whistle or 20 mins at medium heat. Now turn off the stove and let it simmer for 10mins. Now lift the whistle and let the air release from the cooker before you open. 
Open the cooker and check if the dal is cooked well. If not, add a little water & pressure-cook it again till it is cooked well.

Alternatively, you can also cook the dal in a microwave for about 30 mins.

Now, remove the cooked dal in another cooking pot and add water. You can also use a non-stick pot if you have one. If you like the dal to be thin in consistency, add a little more water than 3 cups. If you are eating the dal with roti, I prefer it to be little thicker. Now roughly blend the dal with a hand blender or stir it hard with a spatula, so you can have some gravy and some crushed dal.


Let the dal come to 3-4 boils. Make sure to stir it in between so that it doesn’t stick at the bottom. Let the dal reduce in quantity by boiling some of its water content. Next, add garam masala and bring it to a boil. 

Now it’s time for tadka.

In a small fry pan, add oil & ghee / buter. Heat it and add cloves, cumin seeds, asafoetida and lastly dry whole red chilies. Take it off the stove and add it to the dal. Make sure you reduce your stove’s heat to slow while adding the tadka. Now let the dal come to one more boil and then turn off the heat. 
Add lemon juice to it. Shake well and cover it with a lid. Let the dal rest covered for 5 mins before you serve. Garnish it with chopped cilantro /coriander leaves before you serve.


Enjoy it with Roti or Rice.


Tip 1: If by any chance water is running out of pressure cooker while cooking. Don’t get scared. Reduce the heat to slow and stay away from stove till it stops. Running water out of cooker can only make mess around.

Tip 2: Letting the cooker cool and letting off air from by raising the whistle before opening pressure cooker can prevent accidents.


Tip 3: Any Indian dal needs to be well boiled / cooked. Once the dal is cooked, turn off the heat & let it rest for 5-10mins with the lid covered. This helps the flavor to settle in.

Hope this tips help you well and you enjoy cooking.

Cheers!

Saturday, September 22, 2012

Cheese Corn Cutlets


Hello Everyone!


Hope you all are enjoying your weekend. So, any special plans? For me weekend is food, fun and rest. As you all know that I am as foodie as you. So, every weekend I feel like having something special & different for BRUNCH – something quick, hot snack or a filling appetizer. After thinking hard, I decided to have Cheese Corn Cutlets on the brunch menu today. They are good for adults and great for kids. I am going to serve them with mint, coriander chutney, ketchup, tea and cookies.

Here comes the yummy recipe:

Cheese Corn Cutlet:

Serving: 2-3 people (Big 10pcs – Small 14-15pcs)

Preparation Time: 15-20 mins

Cooking Time: 20-25 mins


Ingredients:
3 potatoes washed boiled, peeled & smashed
1 cup frozen corn kernel / can of corn kernel (You can find that @ any super market) or half cooked fresh corn kernel
2 tbsp. shredded cedar cheese
2 tbsp. shredded mozzarella or processed cheese or Amul cheese (Cheese as per your own dietary wishes - recommendation: more for kids & less for adults)
1 tsp. finely chopped ginger or ginger paste
1 tsp. finely chopped green chilly or chilly paste (more if you like spicy)
1 tbsp. finely chopped cilantro / coriander leaves
1 tsp. butter / margarine
6-8 tbsp. oil/butter to shallow fry
1/2 tsp. chaat masala
1/4 tsp. black pepper
Salt upon taste

Process:
First boil your potatoes in microwave (6-7mins) or pressure cooker (3-4 whistles). 
Then wash the corn kernels if you are using them frozen/canned. Now heat butter in a small sauté pan. Once heated add the corn in butter and toast till you see that all the water inside corn has dried and corn has started turning into light golden color. Now add ginger & chilly. Toast it for 30 sec to 1 min and then let it cool.
In the meanwhile, peel off the boiled potatoes and smash them. Add salt, chat masala, pepper, cilantro (coriander) leaves and cheese to it. Lastly, add the half cooled roasted corn into it and mix it well.

Once the mixture is ready, you can make medium size or small size of cutlets out of the mixture prepared. Take a small portion and make round balls out of it. Then press them with your 4 fingers or palm with light-medium pressure. Turn it around; press them again the same way. Now, lift the cutlet and roll it like a wheel on its sides, to make the sides even.
Now the cutlets are in shape and ready to be cooked. On a fry pan, take 2 tbsp. of oil/butter and heat it at medium setting. Toast them on one side, then turn the cutlets with spatula and again add little oil/butter. Toast it till golden brown on both the side. You can make medium or small sizes of cutlets.

If you make medium size, it will be 10 pcs of cutlets & if, small like me 14pcs of cutlets.

Enjoy them hot with chutney, ketchup & tea or coffee :)

Quick & instant Mint Coriander Chutney coming soon. Stay Tuned :)


Note: If you are making corn cutlet for kids, you might want to avoid green chilies and add more cheese which is recommended in recipe as optional for adults.


Glossary:
Tbsp. = Table Spoon
Tsp. = Tea Spoon
Mins = Minutes (time)

Thursday, September 20, 2012

Mouth watering Modak!

Wish you all a very Happy Ganesh Chaturathi and upcoming festive season. On this auspicious festival of Lord Ganesh Birthday I am welcoming you all to my blog "bonapetitfoodies". In this blog i will writing about my mouth watering, delicious food. So, let me introduce you to myself in short. 


I Rupal Barot young profesional lady have a  passion for cooking. I had learn basic cooking since i was 8yrs. But, I have been cooking independently since past 10 yrs. In this past 10yrs whatever i cooked has turned Super Hit or Blockbuster. My dad, my talented foody NJ friends and my hubby had encouraged me more and more to cook variety of  delicious dishes by praising me all of this yrs. You all have been very kind to me and i am thankful to each of you for all the praise and encouragement. Along with all of you I am really thank full to my mother for teaching me how to cook and passing me her inheritance of cooking. My mom is an excellent cook for years. Today whatever i have achieved is all bcoz of my parents and younger sister.  But today if i am able to start this blog is just because of my hubby's love and support. If you would like to know me more you can check my profile. In this blog i will be sharing you all types of vegetarian food such as  authentic and fusion. I am not a great a writer. But, i will be sharing you my experience and experiments in cooking different dishes. I would love to hear you feed back, your comments and request for any new recipe. I thank you all in advance for being kind & foodie to read my blog. So Bon Apetit Foodies! Here's the recipe for delicious Modak. 

Ganesh Chaturathi a festival of lord Ganesha is celebrated in india for decades. Before this festival of 10 days use to be celebrated in Maharastra more. But, since past 15yrs it has been celebrated all over india. On this festival we invite lord Ganesha to our home for showering his blessings and love. We also believe that when lord Ganesha arrives all the difficulties and trouble goes away. So in this 10 day festival a statue of lord Ganesha is established in homes, buildings or colonies in india. For 10 days people do chanting, havan, puja, aarti and worship different food to lord Ganesha. Lord Ganesha loves sweets along with many things. But his favourite food sweet dish is MODAK. 

Modak is a sweet dumpling. It is a popular in Southern India. It is called modak in Marathi  and Konkani  as well as Gujarati language, modhaka or kadubu in Kanada, modhaka or Tamill, and kudumu in Telugu.  It is called the most favorite dish of Lord Ganesh. Modak is made in india since the time of mahabharat. 
Modak are made out of rice flour / maida, grated coconut, jaggery or sugar and ghee with lots of nuts and dry fruits. People make many types of Modak. Ukadiche Modak are steamed type. Khoya che Modak are for fast. And the one i made today which are simple and delicious are made of all purpose flour (Maida), semolina (sooji), grated dry coconut, sugar, ghee, oil, mava powder and nuts. Today as it was a working day and i have to make them once i am home. so i made the easiest one. But, i will be sharing other recipes of Modak later. So below are the ingredients and  process for the recipe.

Recipe: 
Servings: 4
Preparation time: 15 mins
Cook time: 20 mins


Ingredients: (For Dough)
1 cup all purpose flour (Maida)
2 tsp of semoline (sooji)
1 tbsp of heated oil
pinch of salt 
water to form a dough

Stuffing:
1/2 cup grated dry coconut or coconut powder
1/2 cup powdered sugar / Castor Sugar
1/4 cup + 1 tbsp milk mawa powder
1/4 tsp cardamom powder
1/4 tsp nutmeg powder 
2 tbsp of mix nuts and fruits (raisins, broken cashew & almonds)
1 tbsp of roasted poppy seeds (khus khus)
1 tbsp of ghee

Oil to fry

Process: 


 First of all mix all purpose flour and semolina in bowl. add pinch of salt and heated oil to it. Now form a thick but not too hard dough out of it. The dough should be thicker than roti and softer like puri. Grease ur hands with couple drop of oil and rub them over the formed dough. Now let it rest in a tight container for 15 mins. Make sure you do not let the dough dry.
 Now in a heated non stick pan roast some poppy seeds if you don't have them ready roasted. Remove them and add grated dry coconut and roast it for 2-3 mins on low flame. Once the coconut start changing the color from white to golden, add powdered sugar to it and mix it well. Now add nuts n fruits along with mawa powder to it and roast for another minute or two. Now add ghee to it to bind the stuffing. You can also add more ghee if you like to eat.My recipe recommends less because of health reason. Take the pan of the gas and add cardamom powder and nutmeg powder to it. Cardamom and Nutmeg are optional and you can add them less or more as per your taste. Let the stuffing cool.

 Now in a frying pan add some oil and heat it. Meanwhile starting forming small circle or puri out of the dough you made. The puri should be little thin on edges so we can make a dumpling once stuffed. Now the art of making 
Modak or dumpling is you put the stuffing right in center of the small circle or puri. Now start making thin thin plaits or crease around the puri in such a way that the stuffing doesn't fall and not touch the edges. Once you finish the circle of tightening the dumpling put all the plaits together and bring them in center. Fix all the dough together and pull it in center as pointed shown in picture. You will get more idea about how to stuff by the pictures. Now when two or three modak's  are ready fry them at low heat till the turn golden in color. Your Modak are ready to serve. I served them to lord Ganesha. Enjoy:)